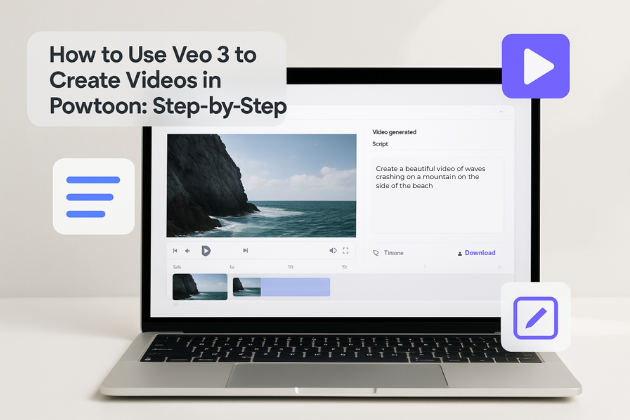
How to Use Veo 3 to Create Videos in Powtoon: Step-by-Step
Veo 3 is an advanced AI video generation model integrated into Powtoon that lets you turn simple text prompts into professional video scenes with synchronized visuals, native audio, and motion. Unlike traditional video creation workflows that require separate editing, animation, sound design, and rendering steps, Veo 3 generates complete video sequences from natural language inputs — empowering teams to produce high-quality content quickly.
With Veo 3 in Powtoon, creators can generate short videos that include dialogue, background ambiance, and music all at once, and then refine the results in Powtoon Studio with additional visuals, voiceovers, and branding.
What Makes Veo 3 Revolutionary?
Before diving into our Veo 3 prompts tutorial, let’s explore what sets Google Veo 3 apart:
- Native audio generation: When learning how to use Veo 3 AI, you’ll discover it generates sound effects, ambient noise, and dialogue natively—no separate audio files needed.
- Exceptional realism: This Veo 3 guide emphasizes how Veo 3 delivers best-in-class quality, excelling in physics and realism. The AI understands real-world physics, ensuring natural-looking videos.
- Advanced prompt understanding: How to use Veo 3 effectively means knowing it interprets complex prompts with high accuracy, translating detailed scenes into cohesive video clips.
Veo 3 Video Creation Tutorial: How to Make Your First Video
Follow the steps below to create your first video using Veo 3 in Powtoon, from setup to final edits.
Step 1: Access Veo 3 in Powtoon
- Log into your Powtoon account
- Click “Create”
- Select “Videos” > “Generate video” to access Veo 3

Step 2: Crafting the Perfect Prompt
The key to exceptional Veo 3 video creation results lies in your prompt structure:
Basic Structure: Scene Description + Character Details + Action + Style + Audio Elements
Here’s an example prompt:
A professional businesswoman in navy blue suit walks confidently through modern glass office lobby. She carries leather briefcase, checking smartphone. Natural lighting from large windows, medium tracking shot. Background sounds: soft footsteps on marble, distant office ambiance.

Step 3: Generate and Review Your Video
- Configure settings: aspect ratio (16:9 landscape or 9:16 vertical), video length (5-8 seconds), quality (High/Standard), audio preferences
- Click “Generate video”
- Wait 2-3 minutes for processing
- Review generated video in the preview window

Step 4: Refining Your Results
Here are some common issues and their solutions:
- Too generic: Add specific details about setting, characters, actions
- Wrong mood: Include emotional descriptors like “energetic,” “calm,” “dramatic”
- Poor composition: Specify exact camera positions and movements
Step 5: Import and Edit in Powtoon Studio
Once satisfied with your Veo 3 generation:
- Click “Add to Scene”
- Video saves to “My videos” folder automatically

Step 6: Add Powtoon Elements
Now that your video is in the studio editor, you can enhance it using Powtoon’s built-in tools. This is where understanding how to use Google Veo 3 within the Powtoon studio is important.

Text and graphics:
- Add animated titles using Powtoon’s font library
- Create lower thirds for professional presentations
- Include brand logos and custom graphics
Audio enhancement:
- Layer background music while preserving Veo 3’s ambient sounds
- Add professional voiceovers
- Supplement with Powtoon’s sound effects library
Step 7: Exporting and Sharing Your Creation
When your video is complete:
- Format: MP4 for maximum compatibility
- Resolution: 1080p or 4K depending on needs
- Compression: Balanced for quality and file size
Sharing options:
- Direct social media upload
- Email marketing campaigns
- Website embed codes
- Cloud storage for team collaboration
Advanced Veo 3 Techniques and Tips
Go beyond the basics with these advanced methods to improve consistency, pacing, and overall quality in your videos.
Writing Better Prompts
The more specific your prompt, the better your output.
- Be specific about timing: Add phrases like “slow motion,” “quick cuts,” or “5-second duration”
- Include camera direction: Mention “close-up,” “wide shot,” or “tracking shot”
- Describe audio elements: Add sound cues like “ambient street noise” or “upbeat music”
- Set the mood: Use terms like “golden hour” or “dramatic shadows”
Keeping Style and Characters Consistent
Maintain a professional look by reusing visual elements across scenes.
- Upload a reference image in the Ingredients panel
- Mention “matching uploaded reference style” in your prompt
- Generate clips that align visually for consistency
Creating Multi-Shot Sequences
Use Veo 3 for structured storytelling across several scenes.
- Sketch a basic storyboard to plan each shot
- Generate each scene separately in Veo 3
- Use Powtoon’s timeline to arrange clips
- Add transitions for a seamless sequence
Troubleshooting Common Issues
If your video doesn’t turn out the way you expected, here are some quick ways to fix common problems:
- Video doesn’t match your prompt: Make your prompt more detailed. Focus on specific visuals, actions, or moods.
- Audio sounds off: Describe the sound clearly in your prompt—mention tone, volume, or specific background noise.
- Characters look different across scenes: Upload a reference image and use consistent character descriptions in each prompt.
- Slow processing time: Make sure your internet connection is stable. For faster previews, try lowering the video quality setting.
Q&A: Using Veo 3 in Powtoon
Q – What is Veo 3?
Veo 3 is Google’s latest AI video generation model that creates full audiovisual content — visuals and native audio — from detailed natural language prompts.
Q – Do I need technical skills to use Veo 3?
No. Veo 3 is integrated into Powtoon with a guided workflow that lets creators generate video from text and then refine it in an editor.
Q – Can I edit Veo 3 videos after generating them?
Yes. Once a Veo 3 clip is imported into Powtoon Studio, you can add graphics, voiceovers, transitions, and other visual elements.
Q – Are there limitations on video length?
Veo 3 is optimized for short clips (often up to several seconds) and is best suited for concept visualization, social content, and idea prototyping.
Q – Can I control the quality of output?
Yes. You can set quality preferences such as Standard or High before generating the video.
Expert Insight
“Veo 3 represents a new co-creation model where human creativity and AI work together. It frees teams to focus on ideas and storytelling while AI handles the heavy lifting of visual and audio generation,” says Powtoon’s Head of Product.
Final Thought
Using Veo 3 in Powtoon opens up a new way to create videos fast — turning ideas into audiovisual content without cameras, editing suites, or deep animation expertise. By combining natural language prompts with AI generation and manual refinement in Powtoon Studio, teams can produce polished videos that communicate clearly and scale rapidly across use cases such as marketing, training, and social content.
Mastering prompts, settings, and edit workflows will help you get the most out of this breakthrough AI tool.

Hanna Abitbul
Latest posts by Hanna Abitbul (see all)
- What is Veo 3 and How Does It Work? - July 7, 2025
- Veo 3 vs. Sora by OpenAI: Side-by-Side Comparison for 2026 - June 26, 2025
- Veo 3 Cinematic Video Creation: Realism Without the Wait - June 25, 2025
- Veo 3 for Marketers: Creating Ads and Product Videos Faster with Powtoon - June 24, 2025